

How To Repair Broken Usb Cord Youtube
In this tutorial, I want to show how to repair broken USB cables. In particular, it is shown how to repair a Micro USB cablesincluding the data transfer wires. I made likewise a video tutorial well-nigh this topic. However, in the video, only a charge-only USB cablevision (with ii wires) is repaired. You find the video here:
How To Repair (Micro) USB Cables | Electronics Know-how To Get #1
Just for the sake of completeness — List of Materials:
– Micro USB cable[connector must be broken ;)] [Search on Aliexpress | Amazon | eBay.com]
– Micro USB plug [Search on Aliexpress | Amazon | eBay.com]
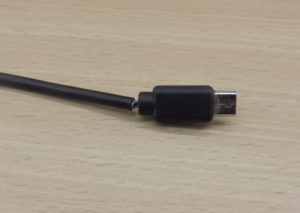
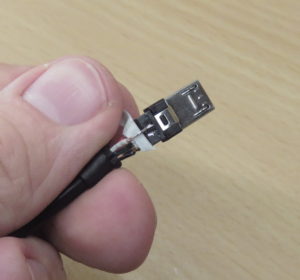
Typically, when a USB cable stops to work, the cable and the wires are often however intact. Instead, the USB connector got probably cleaved. Recently, the connector of 1 of my USB cables became loose. Moreover, it totally stopped working afterward some time.
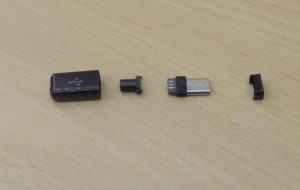
I decided to repair information technology and ordered a pack of USB connector replacements (also chosen plugs, tails, or sockets) from Aliexpress. These USB connector replacements are available in many variants (unlike colors, unlike lengths, etc.).
My connectors consist of four parts:
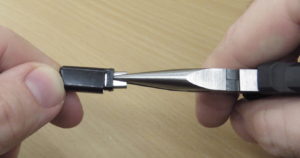
1) The first footstep is to cut off the broken connector: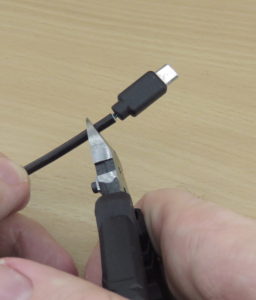
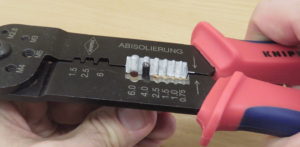
2) Then, the outer jacket must be removed (e.g. with a wire stripper):
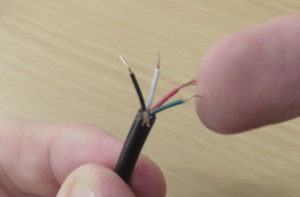
3) Next, the inner wires must be stripped:
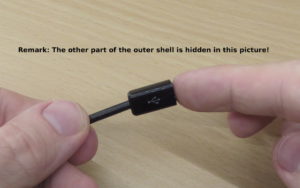
iv) The cable must be moved through the two parts of the connector replacement's outer shell:
5) At present, the soldering (almost) starts. Luckily, the wire colors are standardized and used across many manufacturers. Typically, a micro USB cable has five wires: GND (black), 5V (carmine), Information+ (light-green), Data- (white), and the (outer) Drain Wire, which should be connected to the GND.
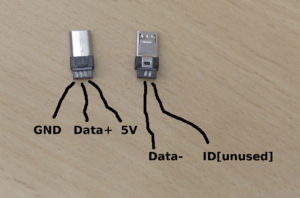
Unfortunately, dissimilar types of USB connector replacements might also have a different layouts. Therefore, have a look at the datasheet or the shop's website to find out which pin has to be connected to which wire. The following moving picture shows the pivot layout for the connectors that I bought:
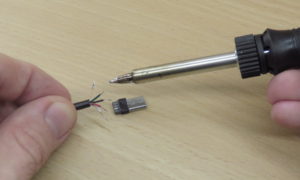
If you are sure nigh where to connect which wire, yous can start soldering:
6) After the soldering, make sure that the wires are properly isolated. I used some record for this task as well as for strengthen my solder articulation:
7) The final step is to put everything together. I used the help of some pliers to press all parts together:
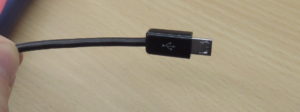
If you have done all these steps correctly, you should have a working USB cable that tin can exist used for charging every bit well as for data transfer again:

How To Repair Broken Usb Cord Youtube,
Source: https://mschoeffler.com/2017/10/29/tutorial-how-to-repair-broken-usb-cables-micro-usb-including-data-transfer/
Posted by: henrysuraceent.blogspot.com
0 Response to "How To Repair Broken Usb Cord Youtube"
Post a Comment